
This exercise shows us the effect of moving a light source around the subject, or rather what information we can give on the subjects colour, shape and form by lighting from different angles. We were to choose a subject that was rounded and with relief, and was smaller than the surface of our diffuser – my subject met two of those three criteria. When I received the course material and read through for the first time, I pencilled in this piece of art as the subject for my fourth assignment. As it turns out, I now have other ideas for that and so here it is in exercise 37 (of the 46 that make up the Art of Photography course). The work is by an artist called J Fray from Settle in Yorkshire. I bought it for my wife a couple of years ago and while she was fairly unimpressed by it, I’ve always loved it. As a result, it sits beside my computer at home. I guess I’m keener on it than she is because I know how much it cost… Anyway, despite not being all that rounded, I decided that it was three dimensional enough to satisfy the brief and the texture and colours of the figure would make for interesting pictures. The camera and subject were left in a fixed position with a plain backdrop a little distance behind. I chose a 100mm lens to separate the subject from the blanket hanging in the background and used camera settings that meant than none of the ambient light would be captured, only that provided by the flash. The flash was set at 1/4 power and remained 4-5 feet from the subject but was moved around to vary the angle. 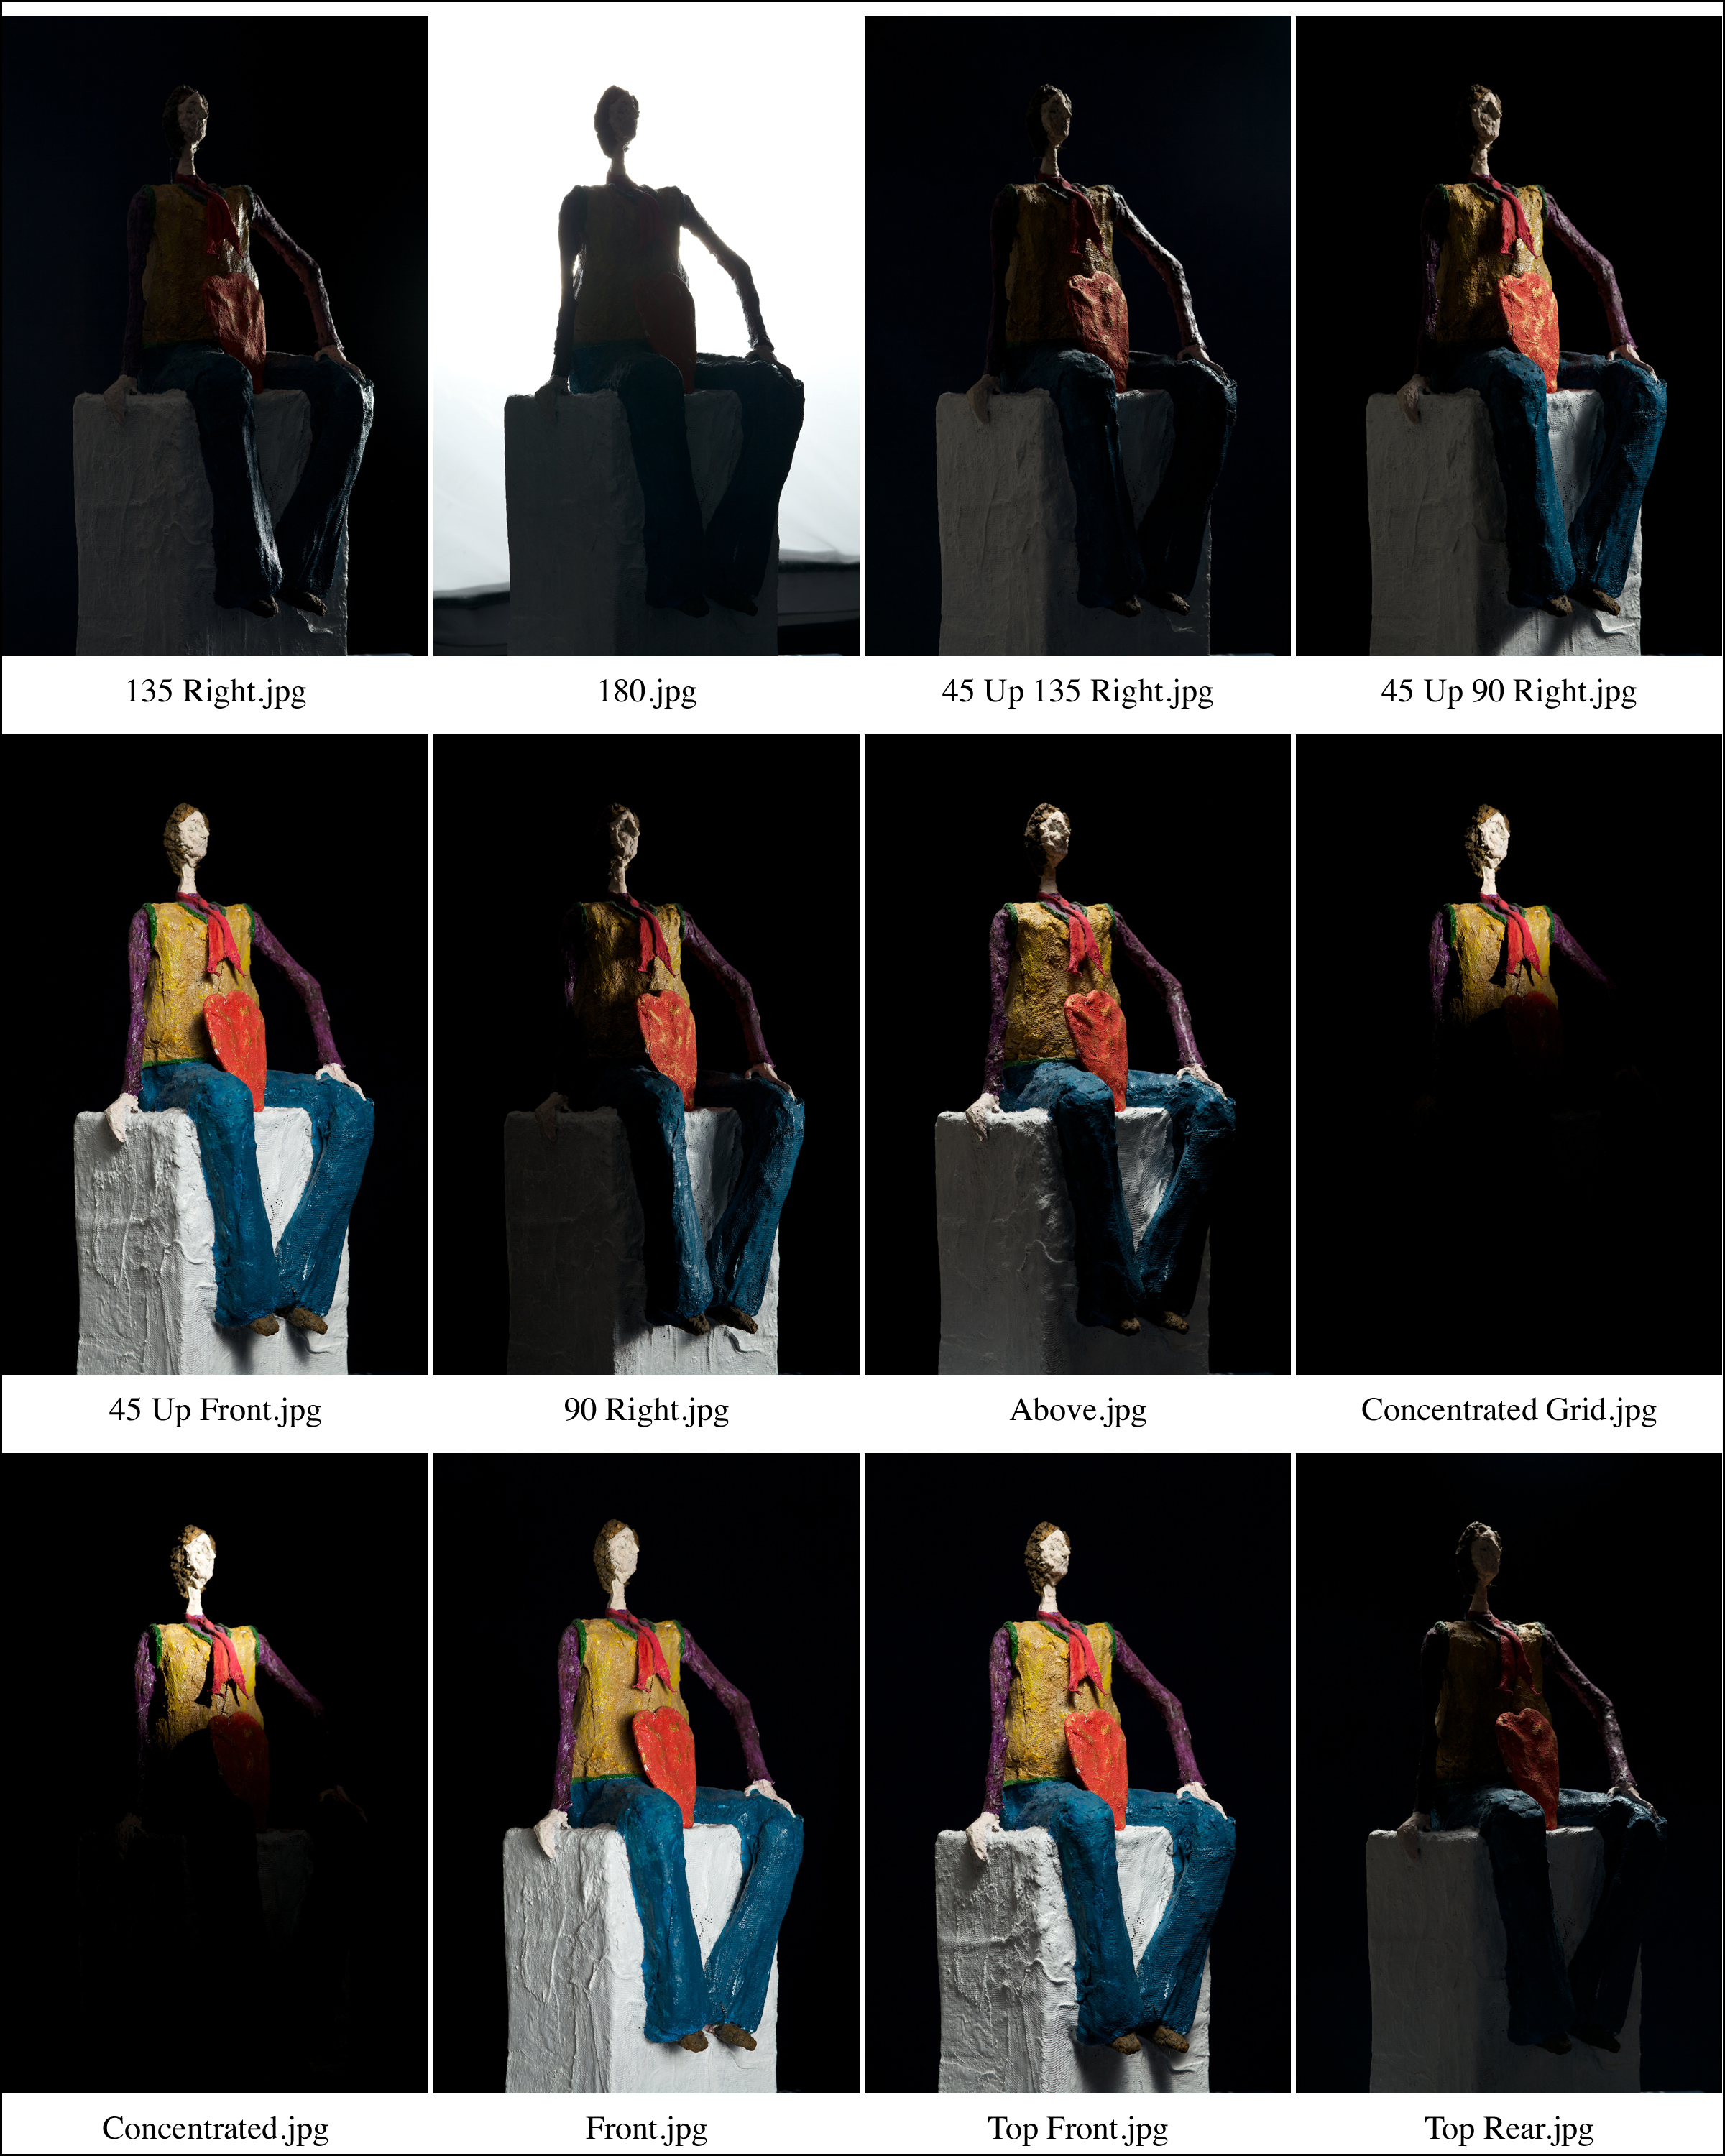 Beginning with the light at the same height as the subject and camera, I shot with the light in front next to the camera, then at 90, 135 and 180 degrees to the camera. Shooting directly into the flash meant that for this shot only (fig. 04), I reduced the aperture to prevent the figure disappearing into the light. For the pictures with the light to the right of the subject and at the same height, I used a black reflector to the left of the model to prevent any reflection from the wall to the left. We’ll get on to using reflectors to reduce contrast and fill the shadows in another exercise.


[…] the set-up from the previous exercise on lighting angle, the next photographs taken were using a concentrated light rather than […]
LikeLike
[…] I mentioned in my post on the lighting angle, I had intended to shoot a small sculpture that we have at home. It has interesting texture, plenty […]
LikeLike
[…] This assignment comes at the end of a series of exercises that investigate the use of different lighting techniques. I’ve explored the colour and temperature of light in different weather conditions and through various times of the day; looking at both available light, natural and man-made, as well as photographic lighting. […]
LikeLike