This assignment comes at the end of a series of exercises that investigate the use of different lighting techniques. I’ve explored the colour and temperature of light in different weather conditions and through various times of the day; looking at both available light, natural and man-made, as well as photographic lighting.
To demonstrate some of the theory learned, this assignment requires 8 photographs that use different lighting techniques to bring out particular physical properties of the same object.
(Click on the pictures below for the full-sized version)
Shape
The shape of an object is an easier quality to understand. It is to do with the outline or edges of an object. The simplest way to use lighting to show the shape of a subject is to increase the contrast between it and it’s background or surroundings.
As we saw in the exercise on lighting angle, when the light was directly behind the subject, giving the greatest contrast, the outline was clearest. In fig.01, rather than using a bright background, I’ve kept the image low hey by using the last of the sun’s light to provide that back-lighting, showing the shape of the upper branches. The lower half of the trunk was below the height of the horizon and would have been lost against it (no contrast), so instead, I lit the bottom half of the tree with my flashgun and softbox.

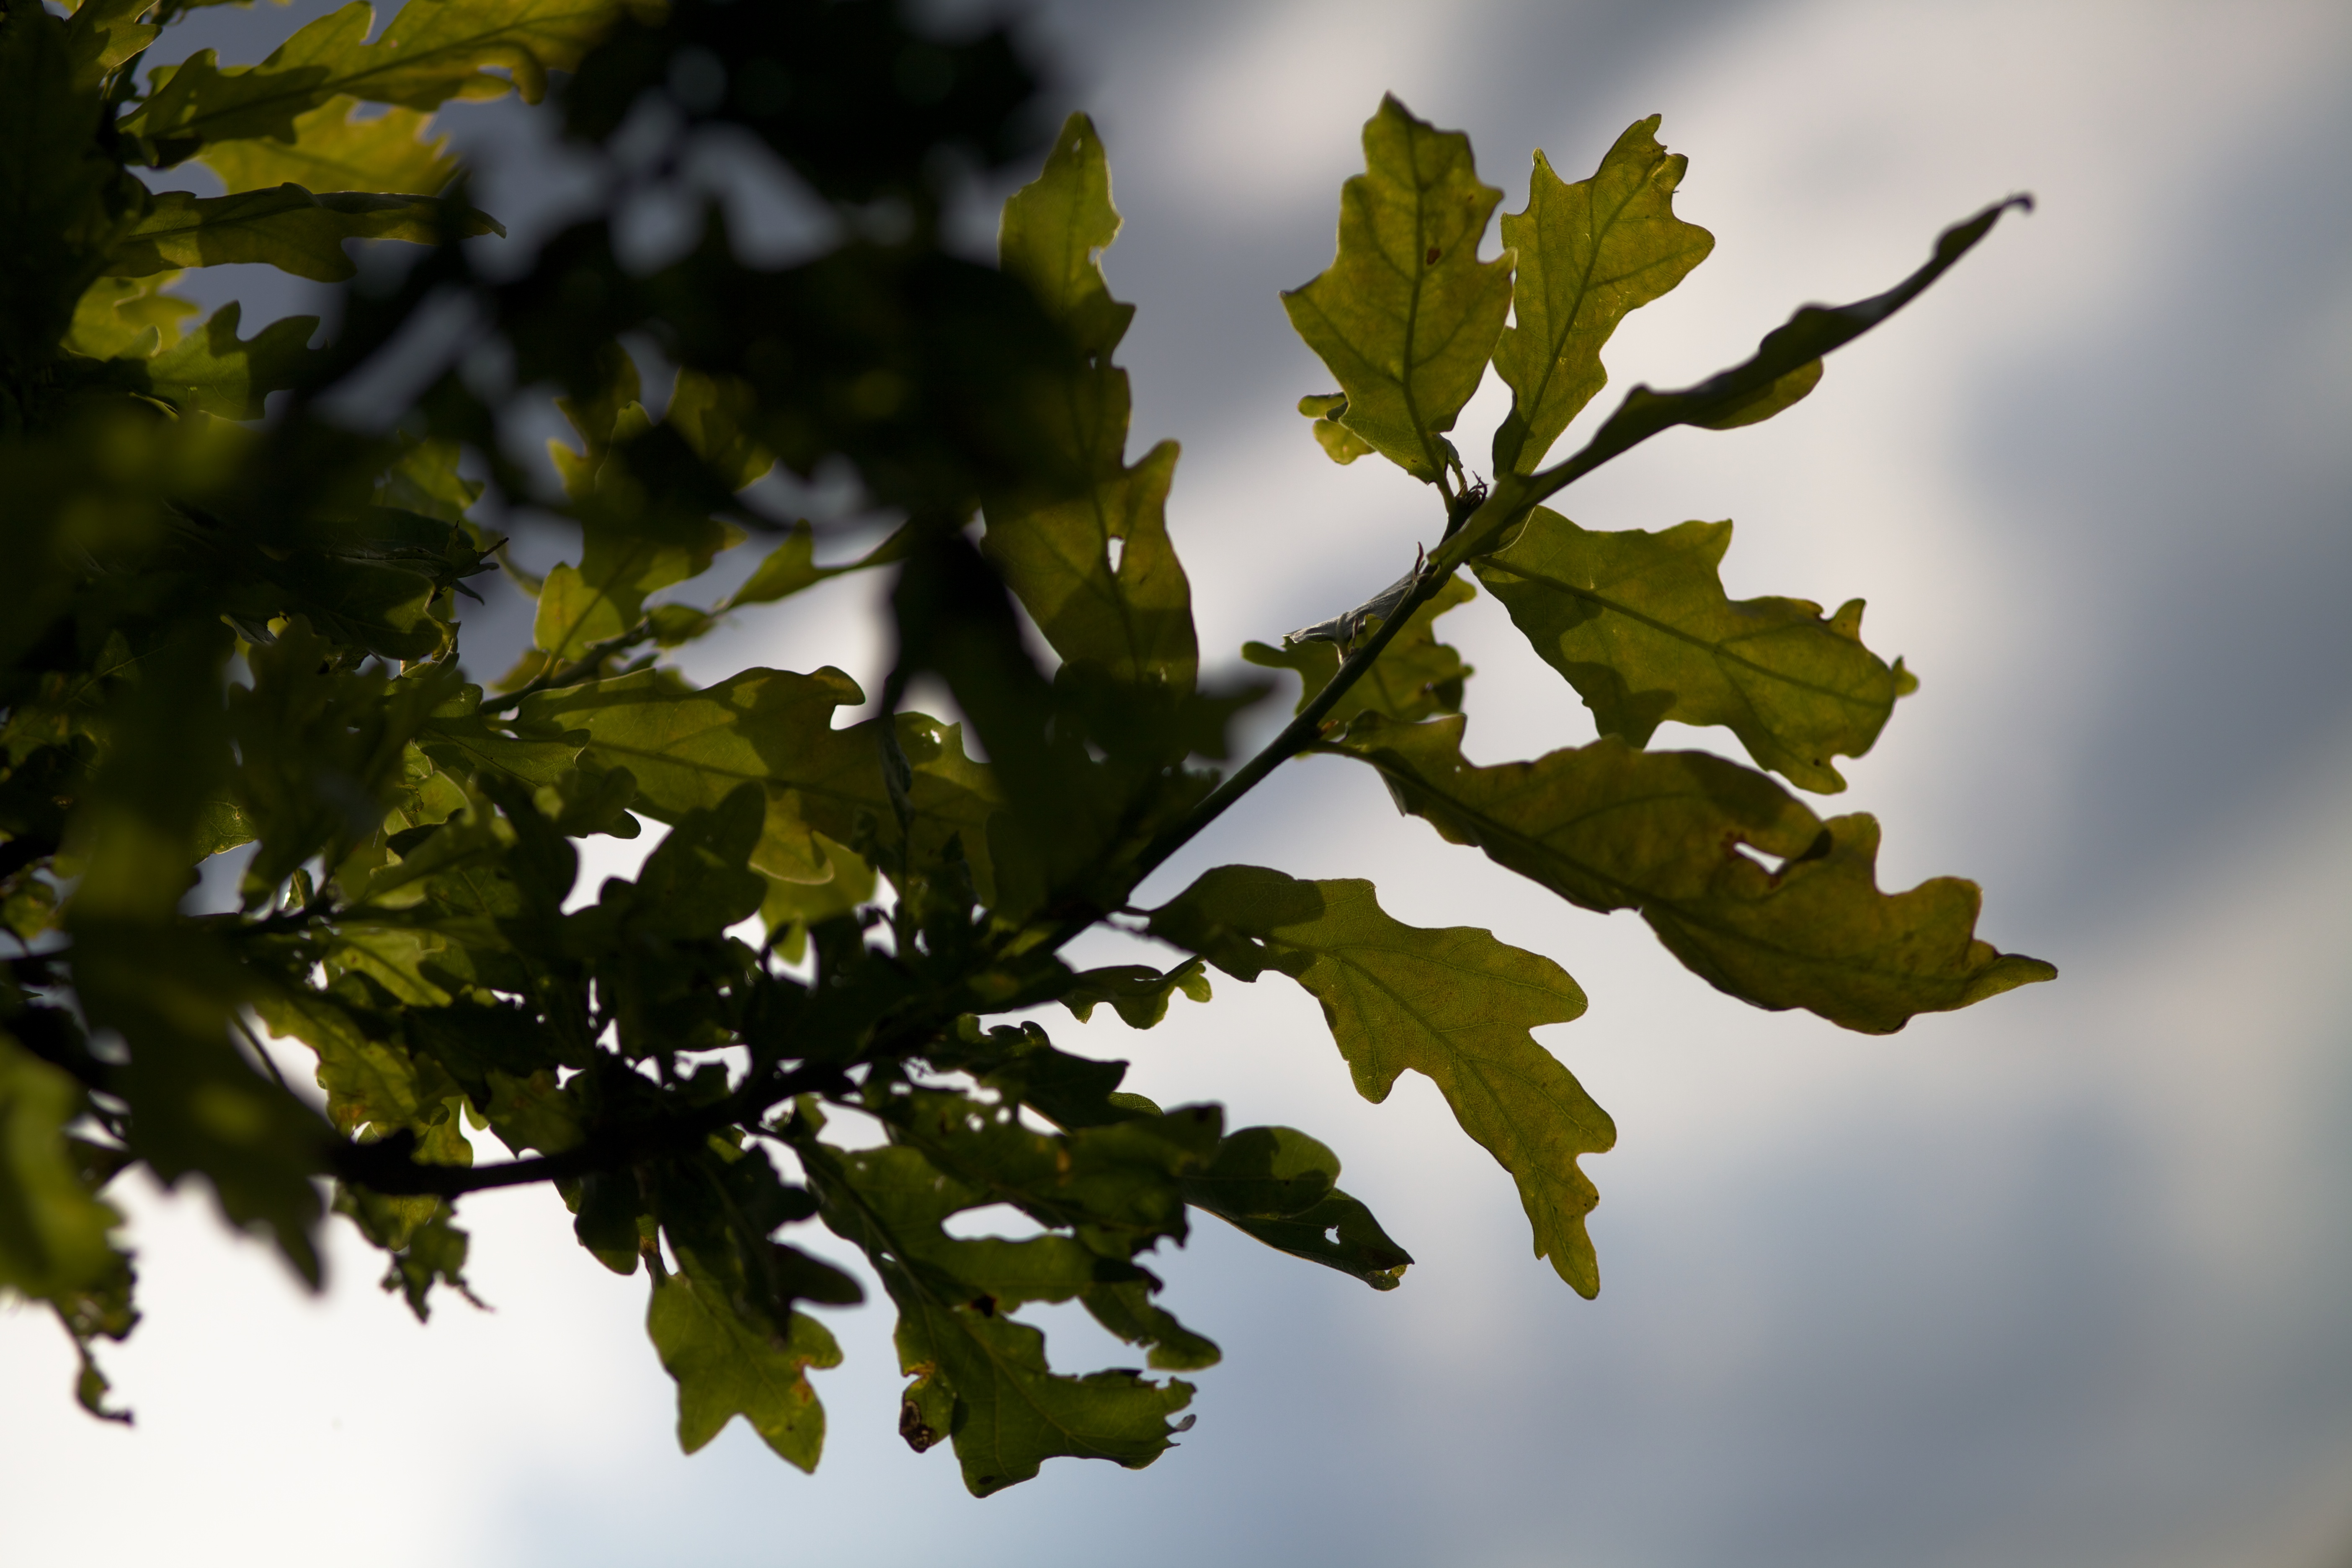
In fig.02, I used diffused afternoon sunlight to provide back lighting of the subject, to show a the shape of the tree’s leaves. The clouds act as a diffuser to the sun’s light meaning that the contrast is not so great between the leaves and sky as it would be in full sunlight (see fig.08), which in turn allows detail to be kept in the subject rather than creating a silhouette.
Form
Form is another way of describing the volume of an object or how three-dimensional it looks. In fig.03, the diffused evening sun light lit the right side of the tree meaning that because the trunk is a hollow arc, the centre and right side would have been in shadow, and the form would not have been obvious.
The softbox to the left was positioned at a distance that gave just enough light on the left of the trunk to cause diffused reflection back to the camera from a small area of the trunk and leaves. Being lit from both sides, the centre is still dark, informing us that it is missing and the trunk isn’t a more usual cylindrical shape.

Later in the evening, with less ambient light, I moved the softbox to a position 60° from the camera (fig.04). Exposing for the sky to retain detail, I used the flash to light the trunk and part of inside of the tree through one of the holes near the base. The parts of the trunk closest to the light are recorded brightest while those further away are darker. Those out of direct sight of the flash are completely dark. This gradient of brightness shows us the form of an object.
The area inside the trunk that is lit again provides the viewer with information that this area of the trunk sits behind the more brightly lit area to the right, indicating its three-dimensional nature.

Texture
Texture is the quality of the surface detail. In fig.05, by positioning the light at 90° to the weathering of the bark, dark shadows were created in the weathered surface of the trunk.

The sun acts as a small, high contrast light source. Shooting the tree’s surface with the sun, camera and subject at similar angles to those in fig.05 (but rotated through 90°), a similar effect is created.

These pictures show that the bark is heavily textured, but because of the lighting, there is no detail in the dark areas of shadow caused by the high-contrast light sources. To show texture and increased detail, the surface could have been photographed with a lower-contrast light source (on a cloudy day or with a large softbox) to light all areas and angles of the surface more evenly. Or, the shadows could have been softened as we learned in an earlier exercise.
Colour
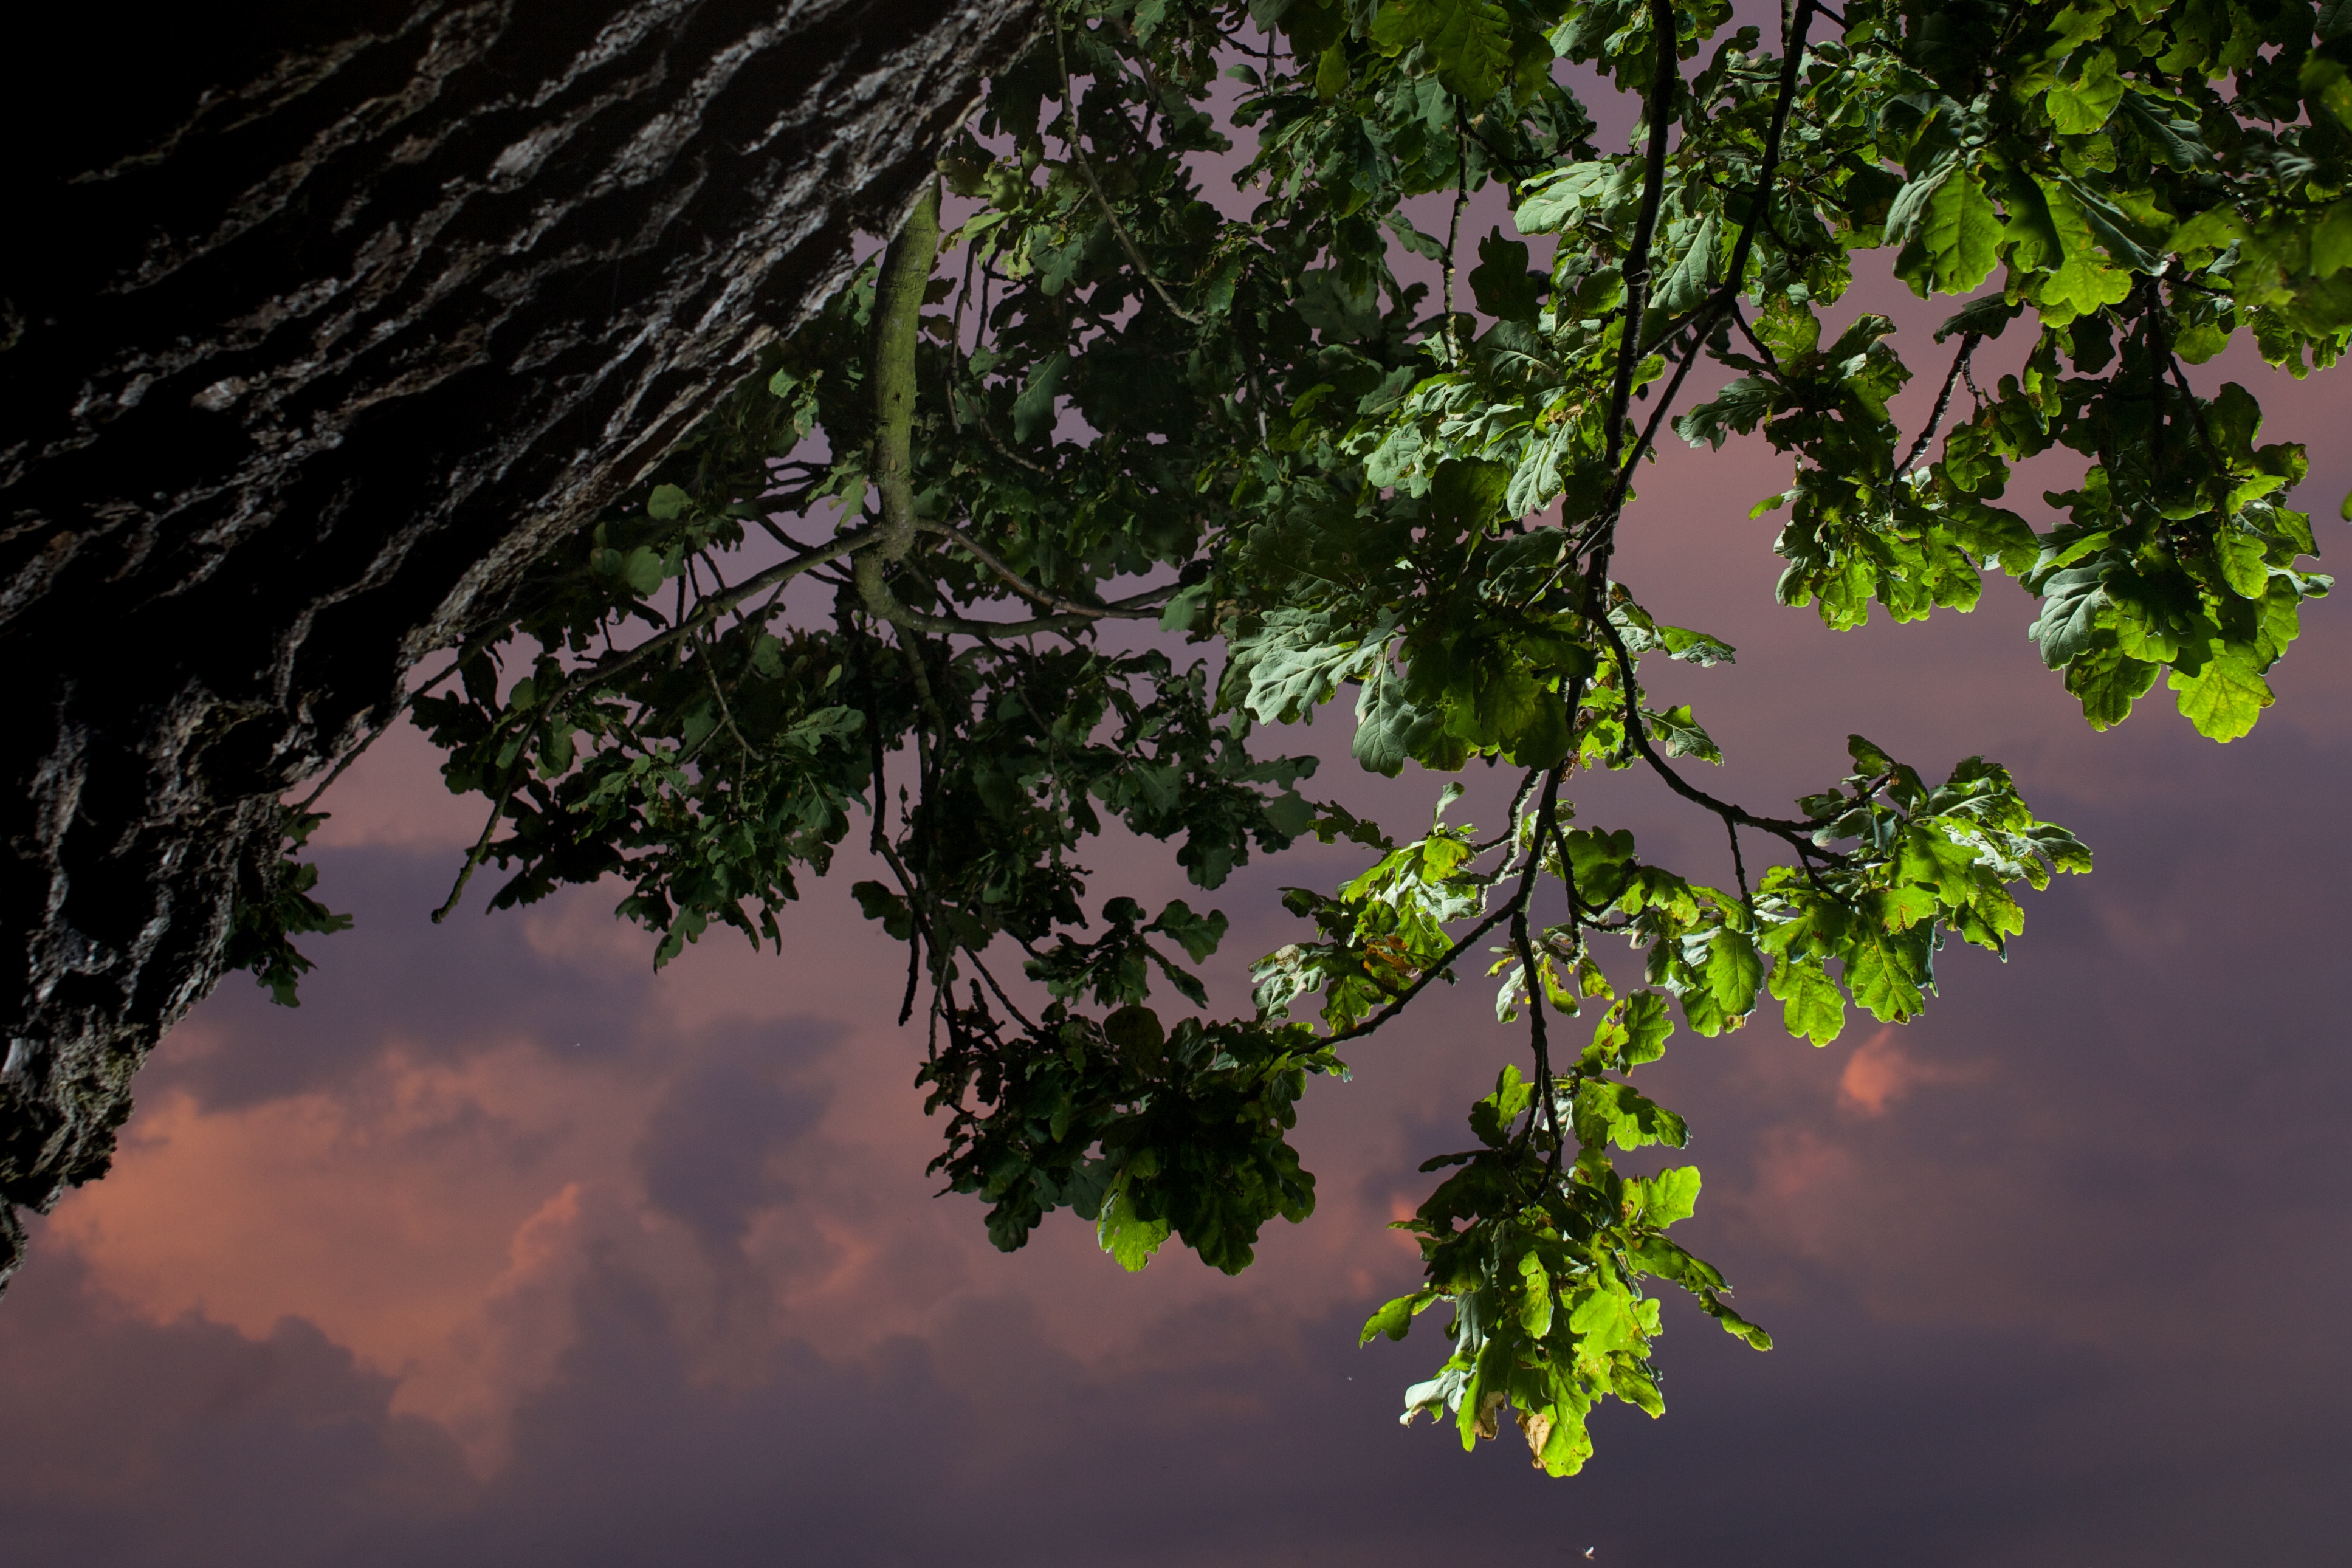
In fig.07, the colour of the leaves has been emphasised by moving the flash close to them. Again, to add interest to the shot the exposure levels were set for the clouds in the background that were lit by the sun that had set moments earlier.
In fig.08, rather than shoot with the light at a similar angle to the camera which is the more conventional method of reproducing colour (as seen in the lighting angle exercise), I photographed the leaves with the sun behind. The translucence of the leaves meaning that they have transmitted light through them showing off their colour.

Subject Choice
For this assignment, I didn’t want to be confined to a spare bedroom with a flashgun taking pictures of an ornament. I wanted to use a subject that I might be interested in shooting other than for this course. I also wanted to use both natural and photographic lighting as we’d studied both during the exercises.
I live a mile from a country park that began as a medieval deer park and is home to several ancient, pollarded oaks that are ‘many centuries old’. One in particular (I used a picture of the tree in my second assignment) has a prominent position overlooking the city at the junction of several paths and has always fascinated me. The trunk has split and twisted over the years and is now only a fragile arc of pockmarked, weathered wood. When spring arrives each year, I’m surprised (and relieved) to see that it is still healthy enough to grow leaves. It seemed an ideal subject and although it may be around for any more centuries, I wanted to photograph it as it was now. Just in case. I suggested the subject to my tutor who liked the idea, suggesting I look at the work three other photographers who have studied trees.
Because the tree is a couple of miles into the park (all up hill), each trip to photograph it, especially carrying tripod, lenses and lighting gear, became an expedition. I began setting the alarm for 4am to get up and check the sky, hoping for the magical light that dawn can provide. More often than not, I went back to bed disappointed. I also visited a couple of times late in the day and while it is a beautiful place to be, it can frustrating to give a couple of hours of my day up waiting for light that doesn’t actually materialise. I made almost 150 pictures across 6 separate visits.
Another difficulty caused by my subject choice was the the practicalities of a using small (90cm) reflector, smaller softbox (60cm) and a standard flash gun to light such a large subject. As a result, I used the flash only to light small areas of the tree or to provide a small amount of fill-in.
Demonstration of technical and visual skills
I’m happy that the images fulfil the brief and that I have used a variety of lighting to bring out the qualities of shape, form, texture and colour. I’ve used direct flash as the main light source, as a fill-in to supplement natural light, and daylight that is both direct sunlight and diffused by cloud. I have resisted my usual temptation to apply post-processing. Additional contrast could have been added to show texture for example, but I’ve allowed the lighting alone to provide this information to the viewer.
Quality of outcome
I’m pleased with the set overall and a couple of pictures particularly. However, while the subject is the same tree in each picture, I would have preferred the set to look more cohesive. Because of the requirement for a range of lighting techniques and my self-imposed desire to use both natural and artificial lighting, the set doesn’t sit together as well as I’d have liked. I didn’t give this as much thought as I should have in advance of taking the pictures, concentrating instead (again) on ‘ticking the boxes’.
I did want a degree of contrast in the set to show the relative permanence of the tree and the delicacy and evanescence of the leaves. This theme would have been better explored in spring or autumn and without the other limitations imposed by the brief.
On street photography blogger Eric Kim’s Facebook page, he lists (he likes lists) 103 lessons that he has learned. It feels like his 57th lesson has applied to me during this assignment. I found the editing of the images difficult for this assignment, repeatedly replacing those selected, particularly for the texture images.
Lesson 57. Spend 99% of your time editing your photos (choosing your best images) and only 1% of your time post processing them.
Demonstration of creativity
The choice of subject in the first place showed some creativity in my approach and rather than simply shooting into the sunset to show shape for example, I’ve tried other lighting techniques. I’ve also selected parts of the tree that showed the various properties that I was looking to emphasis, rather than middle-distance views of the whole tree at different times of the day. I experimented with shooting only the shadow of the tree and using its shape out of focus at the edge of the frame to show shape, but wasn’t satisfied enough with them to make the final cut.
Context
I read about several photographers whose work had studied trees and found many, varied interpretations. My favourites included:
- Simon Norfolk’s study of the oak trees at Blenheim. This was the closest of these works to my original intent. The large lighting set-up that he had obviously used (and smoke machine!) was way beyond anything that I could create with my limited equipment. His set has that cohesion that I was looking for, and he has managed to bring out the shape, form, texture and colour of the trees in each shot, despite shooting from a similar distance each time and in similar ambient lighting conditions.
- Martin Stravars has a similar rigour to his ‘portraits of trees’, resulting in a set that of photographs that look very similar to each other. His use of long-exposure, infra-red and heavy processing makes for striking images and does an excellent job of showing texture and the shape of the trunks and branches.
- A set that really stuck with me was Korean photographer Myoung Ho Lee’s technique of isolating the tree from its surroundings by hanging large backdrops behind them, again really emphasising shape. It is a fascinating method of isolating a subject while at the same time, showing its original surroundings; somehow separating the two but in the same frame.
Further reflection
Comparing these pictures to others that I’ve taken of the tree in the past, it’s satisfying to see that my creativity and technical abilities have improved as a result of this course directly and the wider experience I’ve gained by looking at other work and considering other methods. The course has brought me a long way so far, but as I’ve written a couple of times, the next section on narrative is one that I’m very much looking forward to.
This appears to be the last assignment focussed technical skills with which I’m fairly comfortable, and has us concentrate more on content in future. That said, the use of flash in a ‘studio’ setting was something new to me and learned much from the exercises covering these techniques.
I still enjoy writing this blog and especially looking back through old posts to see my progress and changing attitudes.
I’m now reading more varied sources on photography, visiting every exhibition I have the opportunity to and creating a valuable collection of photobooks. The course has led me to several photographers whose work is inspirational and aspirational and who I tell people about at every opportunity.
Finally, I still need to make more use of the OCA network. I have almost no interaction with fellow students or with tutors as I’ve struggled to find time between the exercises and other research. Whenever I have, and particularly at study visits, it has been valuable.
References
Gibson, D (2014) The street photographer’s manual. London; Thames and Hudson
Bradgate Park website [online] Available from: http://bradgatepark.org/ [Accessed: 28 July 2014]
Kim, E (2014) Facebook [online] Available from : https://www.facebook.com/erickimphotography/posts/10151695315447717 [Accessed: 29 July 2014]
Institute (unknown) Feature: Blenheim Oaks // Simon Norfolk [online] Available from: http://www.instituteartist.com/feature-Blenheim-Oaks-Simon-Norfolk [Accessed: 29 July 2014]
Lens Culture (unknown) Tree. Photographs by Myoung Ho Lee [online] Available from: https://www.lensculture.com/articles/myoung-ho-lee-tree [Accessed: 29 July 2014]
Stavars, M (unknown) Portraits of trees [online] Available from: http://www.martinstavars.com/gallery/portraits_of_trees [Accessed: 29 July 2014]

I am a little envious and impressed that that you made this work. i also came across Simon Norfolk’s trees and spent a long evening of test shots at Frensham Ponds but just couldn’t get anything I was happy with. My excuse was that Norfolk obviously had bigger lights but you have proved that I was fooling myself and that it can be done with a cold shoe soft box. Well done. I must try again when the evenings start to draw in.
LikeLike
Thanks Steve. My first test shots showed me that I was never going to light very much of the tree, so I decided to concentrate on smaller areas to show the various attributes. At best it could provide only a small amount of fill-in.
LikeLike
[…] wondered if the pictures that I’d submitted for my fourth assignment might be more effective if presented in black and white. They’ve also received some […]
LikeLike
[…] tree – I’ve taken pictures of the tree that featured in my fourth assignment for the Art of Photography course for many years. I’m taking a break from it now having taken […]
LikeLike
[…] oak that stands high on the hill overlooking the park was still standing. It’s the tree that I photographed as part of and assignment on my (aborted) photography course a couple of years […]
LikeLike